Getting up and Started with the Haxinator 2000
A streamlined guide to flash, boot, and log in to your new Haxinator 2000.
Currently Supported Devices
- Raspberry Pi 5, 4b, Zero 2W (and possibly others)
- Orange Pi Zero 2W
- Banana Pi BPI-M4 Zero
Required Components
- MicroSD card – 32 GB minimum, Class 10 (A1/U1 or better recommended)
- USB-C or micro-USB cable that carries both power and data
- Optional: Case for protection
Pre-built Images
The easiest way to get started is with our pre-built images available from the Downloads page.
Installation Steps
Step 1: Download the Image
-
Visit the Downloads page
-
Select the appropriate image for your Pi model
-
After the download finishes, verify the SHA-256 checksum:
# Verify checksum (Linux/macOS) sha256sum Armbian-Haxinator-*.xz -
extract the .xz archive so you have a raw .img file. Use your favourite decompression tool or, on the command line:
xz -d Armbian-Haxinator-*.xz # leaves Armbian-Haxinator-*.img
Step 2: Flash the Image
Using Raspberry Pi Imager (Recommended)
- Download Raspberry Pi Imager
- Launch the application
- Click "Choose OS" → "Use custom image"
- Select your downloaded Haxinator image
- Choose your SD card
- Click the gear icon (advanced options) and verify that no customisation options are enabled.
- Click "Write" and wait for completion.
Using Command Line
# Extract the image
xz -d Armbian-Haxinator-*.xz

# Flash to SD card (replace /dev/sdX with your SD card)
sudo dd if=Armbian-Haxinator-*.img of=/dev/sdX bs=4M status=progress
sync
Step 3: Initial Boot
- Insert the SD card into your Pi device
- Connect the USB cable to your computer
- Connect the other end of the USB cable to the USB OTG port on the Pi device. This will turn the device on a Haxinator will boot up.
Important: As the device boots up you will see a new network interface pop up on your connected computer, and your traffic will be routed through it. It might seem like you have lost network connectivity until you get the Haxinator Device connected to the network.
-
From your connected computer, you can start pinging the Haxinator device. Be patient, initial setup can take a minute or two, before you see any ping responses:
hax@devbox ~ % ping 192.168.8.1 PING 192.168.8.1 (192.168.8.1): 56 data bytes Request timeout for icmp_seq 0 Request timeout for icmp_seq 1 ... Request timeout for icmp_seq 120 Request timeout for icmp_seq 121 64 bytes from 192.168.8.1: icmp_seq=121 ttl=64 time=1.238 ms 64 bytes from 192.168.8.1: icmp_seq=123 ttl=64 time=1.155 ms 64 bytes from 192.168.8.1: icmp_seq=124 ttl=64 time=1.179 ms -
Once you get a reply, ssh to the device, with password
rootor1234. This will complete the setup, if you're running headless.hax@devbox ~ % ssh [email protected] Welcome to Armbian-unofficial! ... IP address: 192.168.8.1 Dear Haxinator, your account hax has been created and is sudo enabled. ... Generating locales: en_US.UTF-8 ... root@bananapim4zero:~#At this stage, you're ready to rumble!
Step 4: Access Web Interface
- Open your web browser and navigate to:
https://192.168.8.1 - Accept the self-signed certificate warning
- You should see the Haxinator login page
- Login with username
adminand passwordchangeme
Security Warning: Change all default passwords immediately after first login!
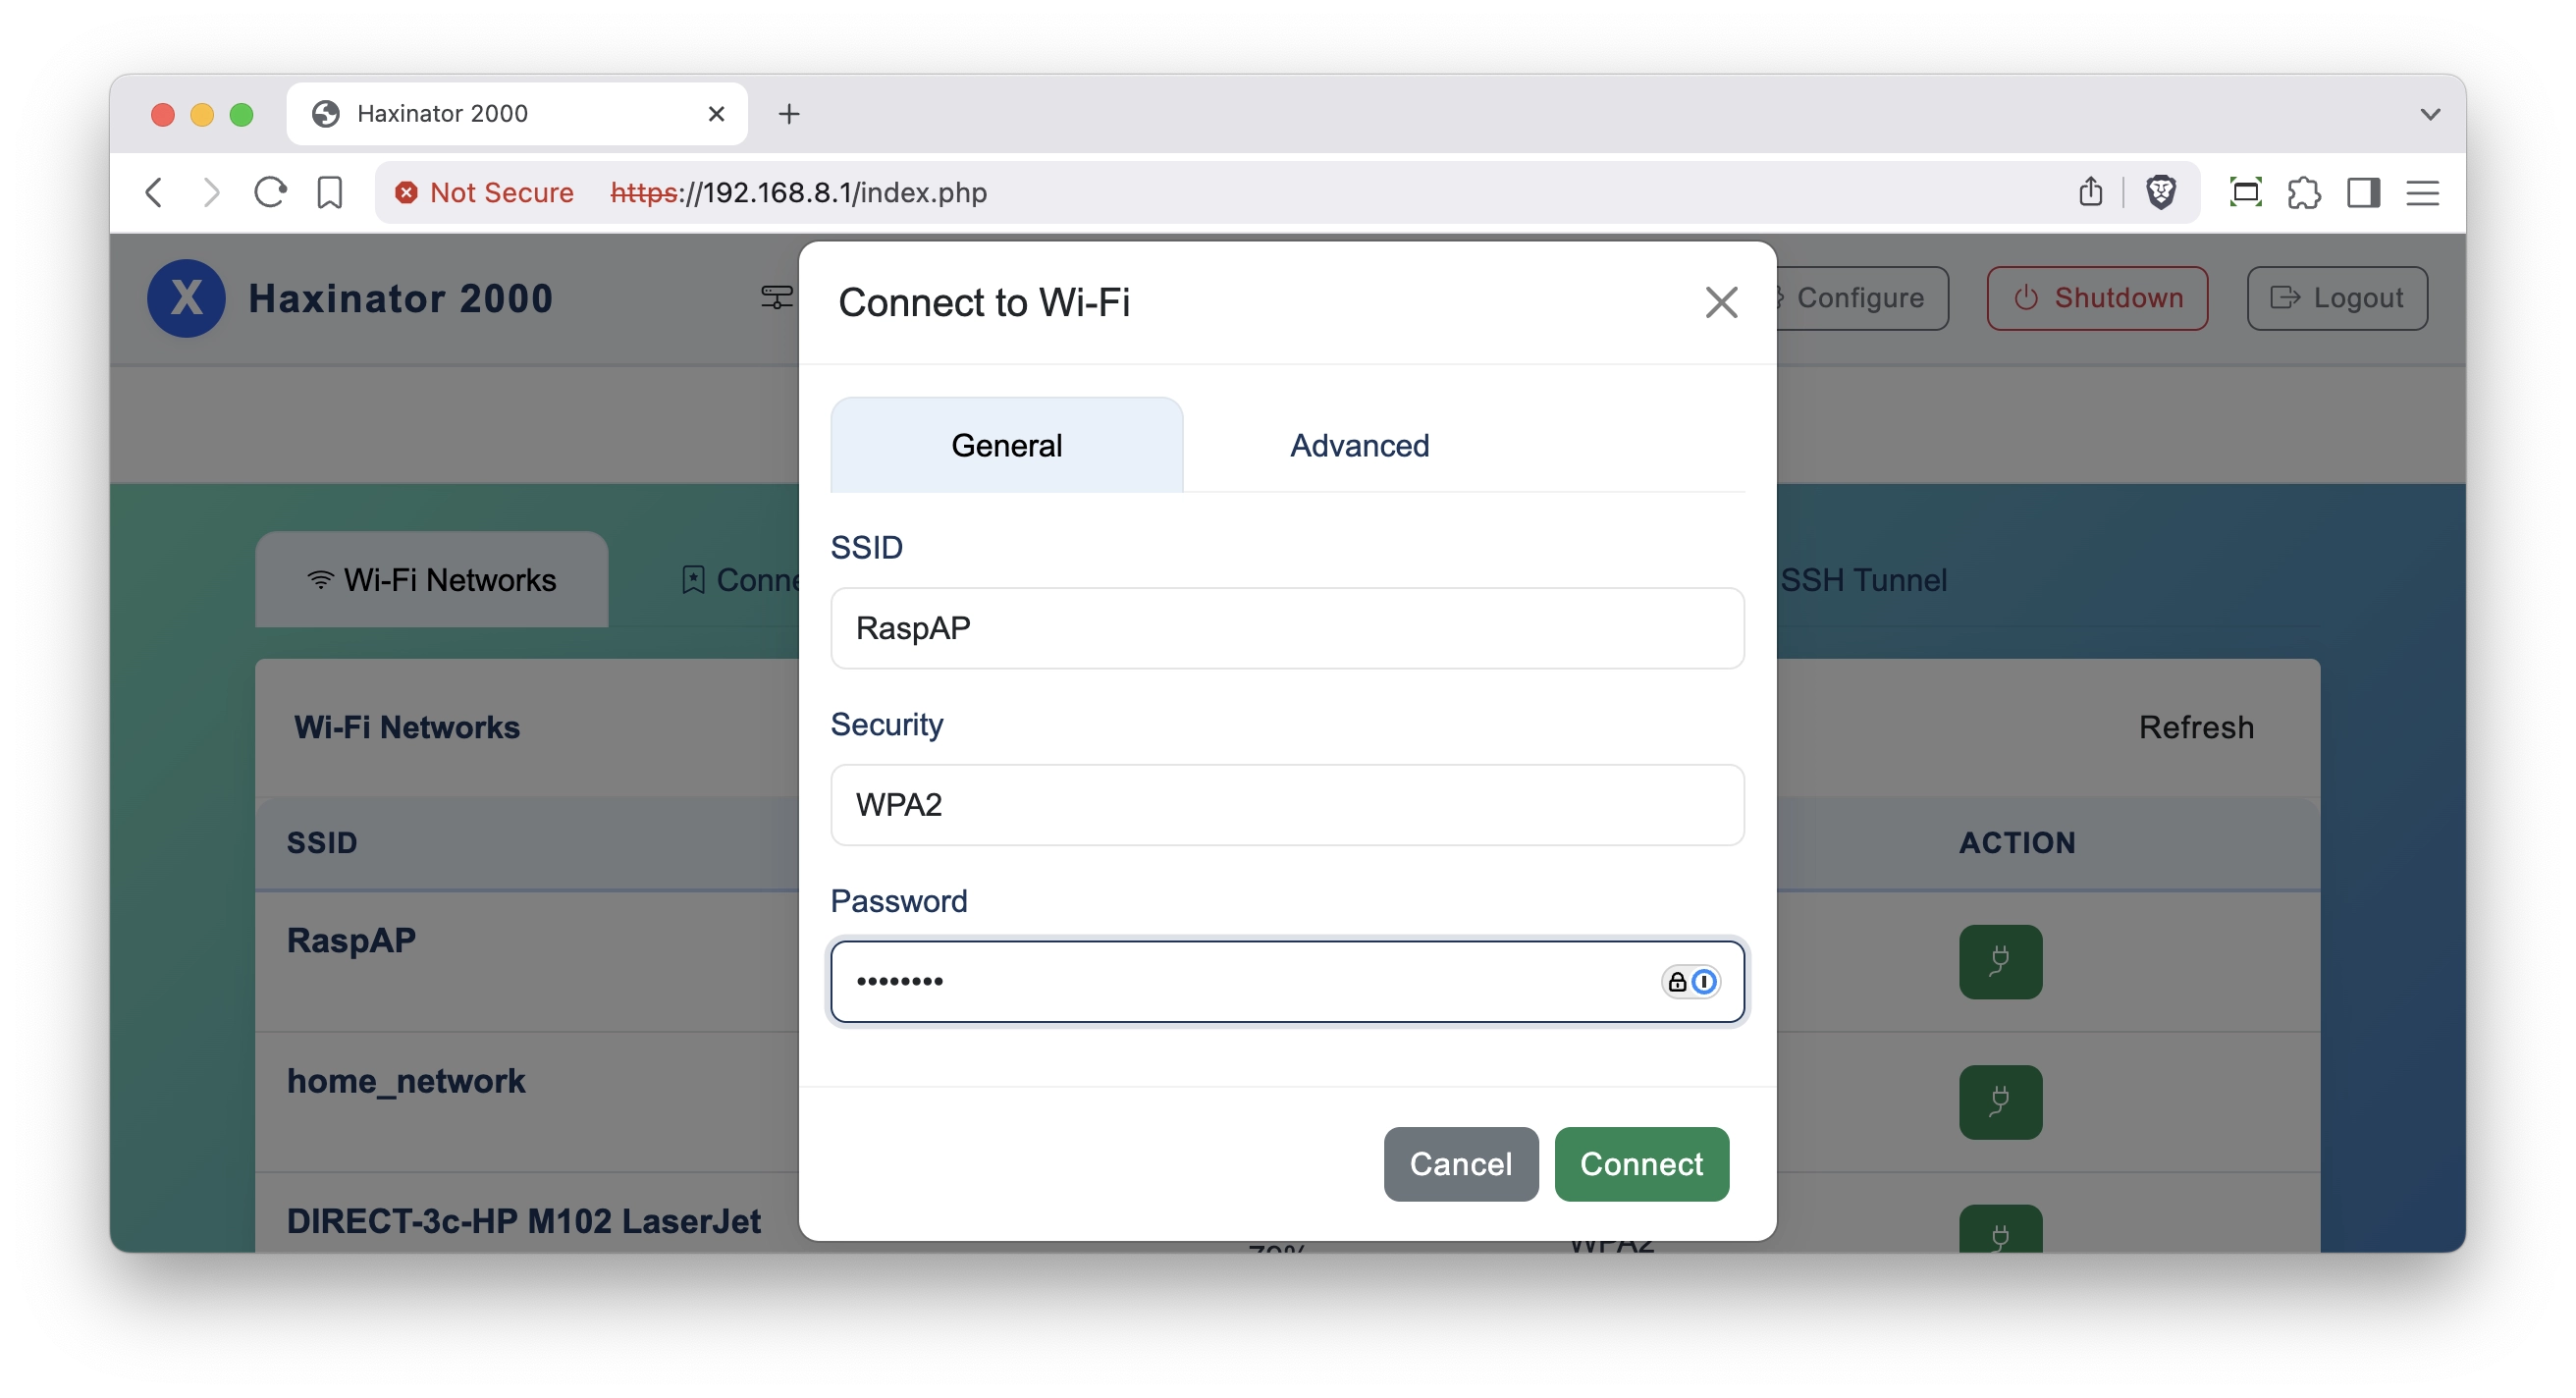
Congratulations! You have a very basic setup of the Haxinator 2000 going. You can now manage, save change your wifi network connections, and other cools things! Let's restore internet connectivity by configuring the Haxinator to connect to a wifi network. Head over to the "Wifi Networks" tab, and connect to your prferred network. If you do not see the SSID of the network, you can press the "Refresh" button on the top right of the table.
Troubleshooting
Device Not Responding
- Check USB Connection: Ensure proper USB-C connection
- Power Issues: Try a different power source
- SD Card: Verify SD card is properly seated
- Double Boot: Wait for complete boot process
Network Issues
- IP Configuration: Check if your computer received 192.168.8.x IP
- Firewall: Temporarily disable host firewall
- USB Drivers: Ensure USB ethernet drivers are installed
Web Interface Not Loading
- Certificate: Accept the self-signed certificate
- Browser Cache: Clear browser cache and cookies
- Alternative Browser: Try a different web browser
Next Steps
Once installation is complete, proceed to:
- Advanced Setup - Set up your tunneling preferences
Getting Help
If you encounter issues:
- Search existing GitHub Issues
- Create a new issue with detailed information about your problem